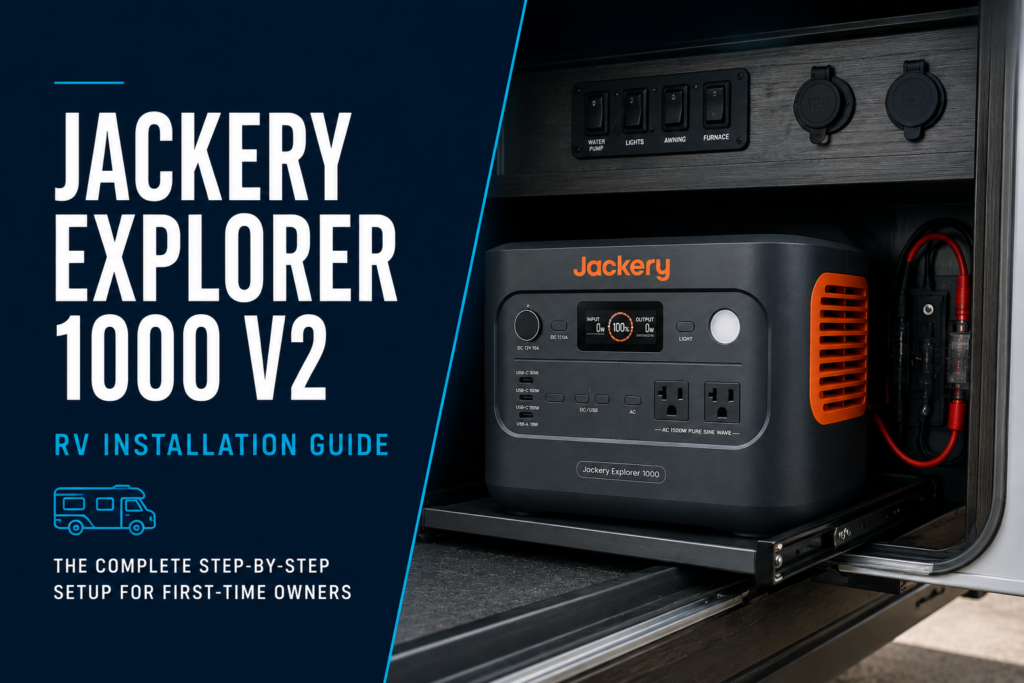
Buying a portable power station is only the first step. Installing it correctly is what ensures reliable performance, safe operation, and years of dependable off-grid power. If you’re searching for a Jackery Explorer 1000 V2 RV installation guide, you’ve come to the right place.
The Jackery Explorer 1000 V2 combines a 1070Wh LiFePO₄ (LFP) battery rated for approximately 4,000 charge cycles to 70% capacity, a 1500W continuous pure sine wave inverter, fast AC charging, and up to 400W of solar input, making it an excellent power solution for weekend campers, van lifers, and full-time RV travelers. Unlike traditional RV inverter systems that require permanent wiring, the Explorer 1000 V2 is designed for a straightforward installation with minimal tools.
In this guide, you’ll learn how to choose the best mounting location, secure the power station, install solar panels, charge while driving, connect your appliances safely, and avoid the most common installation mistakes.
Quick Answer
Installing the Jackery Explorer 1000 V2 in an RV is straightforward because it doesn’t require permanent modifications to your RV’s electrical system. A safe installation involves:
- Choosing a dry, well-ventilated storage location.
- Securing the power station so it cannot move during travel.
- Maintaining proper airflow around the cooling vents.
- Installing compatible solar charging equipment.
- Routing cables neatly and safely.
- Testing every charging method before your first trip.
Following these steps helps maximize battery life, improve charging efficiency, and keep your power station operating safely on the road.
Why the Jackery Explorer 1000 V2 Is an Excellent RV Power Station
The Explorer 1000 V2 offers an ideal balance of portability and power. With a 1500W continuous AC inverter, it can run many of the appliances RV owners use every day while remaining compact enough to fit inside most storage compartments.
Typical appliances include:
- Portable refrigerators
- CPAP machines
- Starlink internet terminals
- LED lighting
- Laptops and monitors
- Camera batteries
- Coffee makers
- Small microwaves
- Fans
- TVs
If you’re still deciding whether this capacity matches your camping style, read What Can a 1000Wh Power Station Run? for detailed runtime estimates.
If you’re comparing models before buying, our Jackery Explorer 1000 V2 Review: Is It Worth Buying in 2026? explains its strengths, weaknesses, and real-world performance.
Before You Begin: Installation Checklist
Preparing your tools and accessories before you start makes the installation much easier.
Essential Installation Products
Jackery Explorer 1000 V2
The heart of your off-grid power system.
Rhino USA Heavy-Duty Tie-Down Straps
These heavy-duty straps prevent the power station from sliding around while driving on rough roads or uneven terrain.
Heavy-Duty Rubber Cabinet Bumpers / Risers
These small risers lift the power station approximately one inch, improving airflow underneath the unit while reducing vibration.
Recommended Installation Tools
Have these tools ready before you begin:
- Drill and driver bits
- Tape measure
- Pencil or marker
- Wire strippers
- Crimping tool
- Caulking gun
- Microfiber towel
- Isopropyl alcohol
- Zip ties
Step 1: Choose the Best Location
Selecting the right location is the most important part of the installation.
The Explorer 1000 V2 should always be stored inside a clean, dry compartment where it is protected from rain, dust, and direct sunlight.
Good locations include:
- Under the dinette bench
- Inside a storage cabinet
- Under the bed
- Inside a pull-out drawer
- Dedicated electrical storage compartments
Avoid installing it:
- Inside the engine compartment
- Near propane cylinders
- Next to water tanks that may leak
- In exterior compartments exposed to moisture
- Anywhere temperatures regularly become extreme
The power station relies on internal cooling fans, so always leave several inches of clearance around all ventilation openings.
Never block the side or rear vents.
Step 2: Secure the Power Station
Although the Explorer 1000 V2 weighs only about 22 pounds (10.8 kg), it can become a dangerous projectile during sudden braking or rough off-road driving if it isn’t secured properly.
The easiest solution is to use:
Rhino USA Heavy-Duty Tie-Down Straps
Attach the straps to existing anchor points or cabinet mounting locations so the battery cannot slide or tip over while traveling.
Avoid overtightening the straps. They should keep the power station firmly in place without putting excessive pressure on the housing or blocking the ventilation openings.
Avoid using inexpensive elastic bungee cords, as they can stretch over time and provide insufficient restraint.
Step 3: Improve Ventilation
Lithium batteries perform best when they can dissipate heat efficiently. Restricting airflow can increase operating temperatures and reduce charging performance.
Place the Explorer 1000 V2 on:
Heavy-Duty Rubber Cabinet Bumpers / Risers
These create a small air gap beneath the unit, allowing cool air to circulate under the enclosure while helping to reduce vibration during travel.
Keep clothing, blankets, luggage, and other gear away from the ventilation openings.
Avoid storing flammable items such as aerosol cans, propane cylinders, gasoline containers, or other fuels in the same enclosed compartment as the power station. Keeping the installation area clean and well ventilated improves both safety and long-term battery performance.
Step 4: Plan Your Solar Installation
One of the Explorer 1000 V2’s biggest advantages is its fast solar charging capability. Before purchasing panels, decide whether you want a portable setup or a permanent roof-mounted installation.
Option 1: Portable Solar Panels
Portable panels require almost no installation and are perfect for campers who often park under trees but place their panels in full sun.
Recommended options include:
Jackery SolarSaga Folding Panels
or
BougeRV 100W Rigid Solar Panels
Portable panels also make it easy to adjust the angle throughout the day for better charging efficiency.
Option 2: Roof-Mounted Solar Panels
A permanent roof-mounted array automatically begins charging whenever sunlight is available, making it ideal for extended off-grid camping.
Recommended accessories include:
Renogy Double Cable Entry Gland
This weatherproof housing creates a clean, leak-resistant cable entry point through your RV roof.
Seal the installation with:
Dicor Self-Leveling Lap Sealant
This industry-standard sealant helps prevent water intrusion around the cable gland and mounting hardware.
Finally, secure rooftop wiring using:
3M Outdoor Adhesive Cable Clips
These clips keep cables firmly attached to the roof, reducing movement caused by wind while driving and helping prevent premature cable wear.
Step 5: Connect Solar Panels Properly
Split Solar Input Across Both DC8020 Ports
One important detail many first-time owners overlook is how the Jackery Explorer 1000 V2 handles solar charging. Although it supports up to 400W of total solar input, that capacity is divided between two separate DC8020 input ports. Each input accepts up to 200W, so if you’re installing multiple solar panels, distribute the power across both ports instead of trying to send the entire 400W through a single connector.
For example:
- Two 100W solar panels can be connected separately to each DC8020 input.
- Two 200W solar panels should also be split across both inputs to achieve the maximum supported charging rate.
- If you’re using non-Jackery solar panels, you’ll need an MC4 to DC8020 Solar Adapter Cable for each cable run.
Important: Trying to push more than 200W through a single DC8020 input may reduce charging performance, even if your solar array is capable of producing more power.
Using Non-Jackery Solar Panels
Third-party solar panels work well with the Explorer 1000 V2 as long as they’re electrically compatible and connected with the proper adapter.
You’ll need:
MC4 to DC8020 Solar Adapter Cable
This adapter converts standard MC4 connectors into Jackery’s DC8020 input, allowing compatible third-party solar panels to charge the power station safely.
If your panels aren’t charging correctly, read Jackery Explorer 1000 V2 Not Charging From Solar? Panel Compatibility Fix for troubleshooting tips.
For longer cable runs between rooftop panels and the battery, use:
10AWG MC4 Solar Extension Cable (15–20 ft)
The thicker 10AWG cable minimizes voltage drop and helps maintain efficient charging, especially on larger RVs.
Step 6: Charge While Driving
Solar charging is ideal while parked, but you can also recharge the Explorer 1000 V2 while driving.
One important thing to remember is that the required vehicle charging cable is not included in the box.
You’ll need:
Jackery 12V DC8020 Car Charger Cable

This cable connects your vehicle’s 12V accessory socket directly to one of the Explorer’s DC8020 charging ports, allowing the battery to recharge during long drives.
If your storage compartment is farther away from the dashboard outlet, add:
10ft Cigarette Lighter Extension Cord (16AWG)
This provides additional flexibility without relocating the power station.
If you’re wondering why this cable is sold separately, read Jackery Explorer 1000 V2 Car Charger Cable: Why It’s Sold Separately.
Step 7: Connect Your RV Appliances
With its 1500W continuous pure sine wave inverter, the Explorer 1000 V2 comfortably powers many of the appliances commonly used in RVs.
Below are several excellent matches for its power capabilities.
BougeRV 12V Refrigerator 42 Quart Electric Car Cooler
The BougeRV 12V Refrigerator 42 Quart Electric Car Cooler is an excellent companion for the Jackery Explorer 1000 V2. It operates on 12/24V DC, features MAX and ECO cooling modes, runs quietly at approximately 45dB, and offers an adjustable temperature range of -4°F to 50°F, allowing it to function as either a refrigerator or a freezer. Thanks to its energy-efficient compressor and built-in 3-level battery protection, it’s well suited for RV travel, camping, overlanding, and road trips while keeping power consumption low.
Tip: The BougeRV 12V Refrigerator 42 Quart Electric Car Cooler normally runs very efficiently from the Explorer 1000 V2’s 12V DC output. However, like many compressor refrigerators, it can draw a brief startup surge that may occasionally trigger the 12V port’s protection circuit. If this happens, simply connect the refrigerator using its 120V AC power adapter to one of the Explorer 1000 V2’s AC outlets. The 1500W continuous pure sine wave inverter easily handles these short compressor startup spikes, providing reliable operation.
Commercial Chef 0.6 cu. ft. Countertop Microwave
Most compact microwaves consume between 600W and 900W, making them an excellent fit for the Explorer 1000 V2.
SEAFLO 12V 3.0 GPM Water Pressure Pump
This efficient water pump typically draws between 40W and 60W, making it ideal for sinks and showers in small RVs.
Bodum Bistro Electric Water Kettle
Drawing approximately 1000W, this kettle boils water quickly while remaining comfortably within the Explorer’s continuous output rating.
Duxtop Portable Induction Cooktop
Use the 1000W or 1300W cooking modes to remain safely below the Explorer’s continuous power limit.
Expand Your Power Distribution Safely
The Explorer 1000 V2 includes three AC outlets, but many RV owners need additional connections for chargers, kitchen appliances, and electronics.
A durable option is:
Tripp Lite Heavy-Duty 6-Outlet Metal Power Strip
Avoid inexpensive household extension strips that lack proper overload protection.
When charging from campground shore power, protect your equipment with:
Hughes Power Watchdog 30A Surge Protector
A quality surge protector helps guard against voltage spikes, low voltage, and wiring faults that occasionally occur at RV parks.
Monitor Everything from Your Phone
The free Jackery Mobile App allows you to monitor and manage the Explorer 1000 V2 remotely through Bluetooth or Wi-Fi.
Using the app, you can:
- Monitor battery percentage
- View input and output wattage
- Check charging progress
- Enable emergency charging mode
- Receive firmware updates
- Monitor charging history
Installing the app before your first trip makes it easier to track battery performance and identify unexpected power consumption.
Common Installation Mistakes to Avoid
Even though installation is simple, avoiding a few common mistakes will improve both safety and performance.
- Blocking the cooling vents with luggage or blankets.
- Forgetting to secure the power station before driving.
- Installing the battery where moisture can accumulate.
- Attempting to send more than 200W through a single DC8020 solar input.
- Using incompatible solar adapters.
- Exceeding the 1500W continuous AC output.
- Running loose cables that can rub against sharp cabinet edges.
- Charging the battery in direct summer sunlight whenever possible.
- Skipping surge protection when connected to campground power.
Maintenance Tips
Keeping the Explorer 1000 V2 in excellent condition requires very little maintenance.
To maximize battery life:
- Store the battery in a cool, dry environment.
- Recharge it every few months during long-term storage.
- Keep ventilation openings free from dust.
- Inspect charging cables regularly for wear.
- Clean solar panel connectors before connecting them.
- Update the firmware periodically through the Jackery app.
These simple habits help preserve battery health and ensure dependable performance for years of camping.
Frequently Asked Questions
Can I permanently install the Jackery Explorer 1000 V2 in my RV?
Yes. While it’s designed as a portable power station, many RV owners securely mount it inside a cabinet or storage compartment using heavy-duty tie-down straps while maintaining adequate airflow.
How many solar panels can the Jackery Explorer 1000 V2 support?
The Explorer 1000 V2 supports up to 400W of total solar input across two DC8020 input ports, with each port accepting up to 200W.
Can I charge the Jackery Explorer 1000 V2 while driving?
Yes. You’ll need the Jackery 12V DC8020 Car Charger Cable, which is sold separately.
Can the Jackery Explorer 1000 V2 run an RV refrigerator?
Yes. Efficient compressor refrigerators such as the BougeRV CR45 work very well with the Explorer 1000 V2. If you’d like runtime estimates, read How long will a 1000Wh power station run a fridge?
Why don’t my older Jackery charging cables fit?
The Explorer 1000 V2 uses Jackery’s newer DC8020 charging ports. Older accessories may require an adapter. See Jackery Explorer 1000 V2 DC8020 Port Not Working With Your Old Cables? Here’s the Fix for more information.
Is the Jackery Explorer 1000 V2 powerful enough for full-time RV living?
For many travelers, yes. It easily powers lighting, portable refrigerators, laptops, communication devices, CPAP machines, and many kitchen appliances. However, large rooftop air conditioners, electric water heaters, and other high-demand appliances typically require a larger power system.
Final Verdict
The Jackery Explorer 1000 V2 is one of the easiest portable power stations to install in an RV. Its compact size, 1070Wh LiFePO₄ battery, 1500W pure sine wave inverter, dual 200W DC8020 solar inputs, and straightforward charging options make it an excellent choice for both weekend campers and full-time travelers.
By choosing a well-ventilated installation location, securing the unit properly, using compatible charging accessories, and following the best practices outlined in this Jackery Explorer 1000 V2 RV Installation Guide, you’ll enjoy safe, reliable power wherever your adventures take you.
Whether you’re powering a refrigerator, charging electronics, or building a complete off-grid camping setup, a carefully planned installation will help you get the most from your investment for years to come.